A Guide to the Compact 65 Aluminum Keyboard

Quick Start Guide

What's in the Box

  • Compact 65% Aluminum Mechanical Keyboard
  • USB-C to USB-A Braided Cable
  • 2.4GHz Wireless Receiver
  • Switch Puller Tool
  • Keycap Puller Tool
  • User Manual

First-Time Setup

Ready to Use: Your keyboard is pre-charged and ready for immediate wireless use. Remove any protective film before first use.
  1. Remove protective film from keyboard surfaces
  2. Power on keyboard using the mode switch on the back
  3. Select your connection mode (Bluetooth / 2.4GHz / Wired)
  4. For Mac users: Long press FN + WIN for 3 seconds to switch to Mac mode
  5. Pair with your device using the instructions below

Build Specs at a Glance

Spec Detail
Case CNC Aluminum Alloy
Mount Gasket
Plate PC Plate
PCB Hot-swappable, 3-pin / 5-pin compatible
Stabilizers Plate-mounted
Keys 66 keys + 1 knob
Connectivity Bluetooth 5.0 / 2.4GHz / Wired (USB-C)
LEDs South-facing RGB
Anti-Ghost NKRO / 6KRO
Polling Rate 1000Hz (Wired / 2.4GHz) · 125Hz (Bluetooth)
Battery 4000mAh
OS Windows / Mac
Dimensions 320 × 116 × 43.33mm
Weight 1270g
About This Board: This is our first aluminum keyboard. The CNC-machined case adds substantial weight and resonance compared to plastic builds — that heft is intentional. Gasket mounting absorbs impact and returns a deep, cushioned thud on every keystroke.

Connection Modes

Bluetooth Mode (3 Devices)

  1. Slide mode toggle to Bluetooth position
  2. Long press FN + Q (Device 1), FN + W (Device 2), or FN + E (Device 3) until FN key blinks white
  3. Open Bluetooth settings on your device and select the keyboard
  4. FN key stops blinking when pairing is complete
  5. To switch between paired devices: quick press FN + Q / W / E
Pro Tip: FN key blinking white means pairing mode is active. If battery is below 10%, charge for 15–20 minutes before attempting to pair.

2.4GHz Wireless Mode

  1. Slide mode toggle to 2.4G position
  2. Insert the included 2.4GHz receiver into a USB port on your computer
  3. Keyboard connects automatically — no pairing required
  4. Polling rate is 1000Hz in this mode

Wired Mode

  1. Connect USB-C cable to keyboard and computer
  2. Slide mode toggle to wired position
  3. Keyboard activates immediately with default RGB effect
  4. Polling rate is 1000Hz in this mode
Note: Bluetooth polling rate is 125Hz. For gaming or latency-sensitive work, use Wired or 2.4GHz mode.

Keyboard Layout & Function Keys

Compact 65% Layout

  • Standard QWERTY layout with 66 keys + volume knob
  • Dedicated arrow keys — no function layer required
  • Delete, Page Up, Page Down keys always accessible
  • F1–F12 available via FN layer
  • All essential keys within natural hand reach

Windows Mode — FN Key Combinations

Key Combination Function
FN + ESC Grave accent (` ~)
FN + 1–9 F1–F9
FN + 0 F10
FN + - F11
FN + = F12
FN + DEL Insert
FN + PGUP Home
FN + PGDN End
FN + WIN Lock / Unlock Windows key (long press 3s: toggle Mac / Win mode)
FN + BACKSPACE Factory reset (hold 5 seconds)

Mac Mode — FN Key Combinations

Key Combination Function
FN + ESC Grave accent (` ~)
FN + 1 Screen Brightness Down
FN + 2 Screen Brightness Up
FN + 3 Mission Control
FN + 4 Launchpad
FN + 7 Previous Track
FN + 8 Play / Pause
FN + 9 Next Track
FN + 0 Mute
FN + - Volume Down
FN + = Volume Up
FN + PGUP Home
FN + PGDN End
FN + WIN Long press 3s: toggle Mac / Win mode
FN + BACKSPACE Factory reset (hold 5 seconds)

Mac Compatibility

Toggle between Mac and Windows modes by long pressing FN + WIN for 3 seconds. Mac mode optimizes FN layer shortcuts and media controls for macOS.

RGB Backlighting

Basic RGB Control

Function Keys
Brightness Up FN + ↑
Brightness Down FN + ↓
Speed Increase FN + →
Speed Decrease FN + ←
Saturation Increase FN + [
Saturation Decrease FN + ]
Cycle RGB Modes FN + \

South-Facing LEDs

This board uses south-facing LEDs, which shine light toward the bottom of each keycap opening. This positioning delivers a clean underglow effect and works beautifully with translucent or shine-through keycaps. Shine-through legends glow most vividly with south-facing configurations.

Battery Saver: Lower RGB brightness or disable backlighting entirely to extend battery life significantly. The aluminum case acts as a heat sink — the board stays cool even with extended RGB use.

Volume Knob

Basic Operation

  • Turn clockwise: Increase volume
  • Turn counter-clockwise: Decrease volume
  • Press down: Mute / unmute
Note: The volume knob is hardware-dedicated to volume control and cannot be reprogrammed through the default firmware. RGB adjustments are handled via FN layer key combinations.

Battery & Charging

Battery Specifications

  • Capacity: 4000mAh
  • With RGB enabled: Battery life varies based on brightness level
  • With RGB disabled: Significantly extended battery life
  • Charging time: Approximately 3–4 hours to full capacity
  • Low battery indicator: LED flashes when battery is critically low — charge immediately

Charging Instructions

  1. Connect the USB-C cable to the keyboard and a power source
  2. Charging indicator illuminates during charging
  3. Continue using the keyboard while it charges (supported in wired mode)
  4. Indicator changes when fully charged
Sleep Mode: Keyboard enters sleep mode after a period of inactivity. Press any key to wake. If the keyboard won't wake, charge for 15–20 minutes before troubleshooting further.

Power Management Tips

  • Use Wired mode during long creative sessions for unlimited power
  • Lower RGB brightness to extend wireless battery life
  • Charge before battery drops critically low for best long-term battery health
  • The 4000mAh battery is larger than standard compact keyboards — expect solid wireless runtime

Switch Swapping & VIA Remapping

Hot-Swap Switch Installation

The PCB is hot-swappable and supports both 3-pin and 5-pin switches. No soldering required.

Before You Start: Inspect all switch pins before installation. Bent pins are the most common cause of non-functioning keys. Straighten any bent pins carefully before inserting.

Removing Switches

  1. Use the included switch puller tool — align the gripping teeth vertically (Y-axis) at the center of the switch
  2. Grip the switch firmly with the puller and apply even pressure until it releases from the plate
  3. Pull straight up with a smooth vertical motion — no rocking or twisting

Installing Switches

  1. Confirm all metal pins are perfectly straight and clean
  2. If your board has south-facing LEDs, orient the switch so the Gateron logo faces north — pins align with the PCB automatically
  3. Press the switch straight down until you hear a click — clips have attached to the keyboard plate
  4. Test the key before moving on
Important: If a key doesn't register after installation, you likely bent a pin during insertion. Pull the switch, straighten the pin, and reinstall. Never force a switch — damaged pins may need full replacement. If you cannot remove or install switches, contact support before attempting further.

Keycap Removal

Use the included keycap puller. Hook the wire loops under opposite corners of the keycap, squeeze gently, and pull straight up. Never twist or pry at an angle — this risks damaging the stem or the switch below.

VIA Remapping

This keyboard supports VIA for full key remapping, macro programming, and per-key RGB customization.

Connecting to VIA

  1. Visit https://github.com/WestBerryVIA/via-releases/releases to download the latest VIA application for your OS. Disable "Use V2 definitions (deprecated)" in settings.
  2. Download the keyboard JSON definition file from the manufacturer's website and load it into VIA via the Load Draft Definition option.
  3. Once loaded, the Configure tab displays your full layout with all programmable keys.
VIA Tip: Save your layout configuration as a JSON file after customizing. This lets you restore all remaps and macros if you need to factory reset or switch computers.

Factory Reset

Hold FN + BACKSPACE for 5 seconds to reset all key mappings and settings to factory defaults. This clears any VIA customizations stored on the board.

need support?

Let's get you up and running. Talk to us.

frequently asked questions

Why is this keyboard heavier than my last one?

This is our first aluminum keyboard. The CNC-machined aluminum alloy case weighs significantly more than plastic builds — the total weight is 1270g. That heft translates directly into stability on your desk, deeper sound resonance, and a premium feel that plastic simply can't replicate. It's not going anywhere while you type.

How do I switch between RGB color modes?

Use FN + \ to cycle through backlight effects, FN + ↑ / ↓ to adjust brightness, and FN + ← / → to control animation speed. On supported effects, use FN + [ / ] to change colors.

How do I switch between Bluetooth devices?

Quick press FN + Q/W/E to switch between three paired Bluetooth devices. Channel indicator: Q = Blue, W = Green, E = Red.

How do I switch between Mac and Windows?

Yes. Press FN + S for Mac mode or FN + A for Windows mode. In Mac mode, the F-row defaults to system controls (brightness, media, Launchpad, etc.). In Windows mode, F-keys work as standard function keys and FN + F-row activates app shortcuts.

How many devices can I pair?

Short press FN + Q, FN + W, or FN + E to switch between your three paired Bluetooth devices instantly. To pair a new device on any of those slots, long press the corresponding combination until the keyboard enters pairing mode.

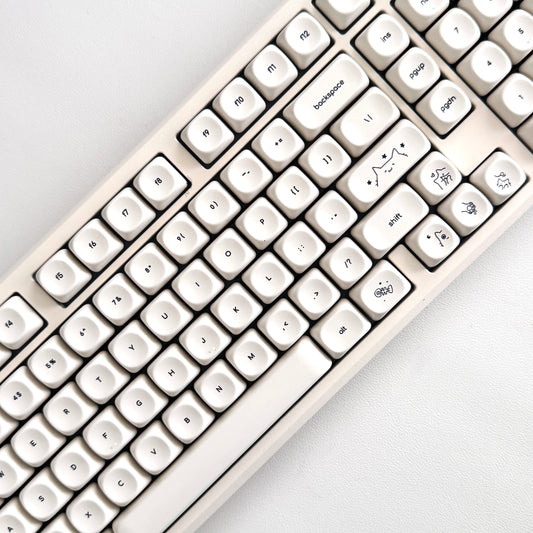
Does it have a numpad?

Yes. A full numpad is included. The layout keeps the bottom row aligned while compacting the direction keys flush against the right shift — no dropped arrow cluster. Del, Home, End, Print Screen, Insert, Page Up, and Page Down are all present.

How do I know when the battery is low?

Red light shows when battery level drops below 20%. Connect USB cable to charge. Red light remains on while charging.

How do I check the battery level?

Press FN + SPACEBAR. The battery indicator will display on the keyboard.

What about arrow keys for coding?

65% keyboards include dedicated arrow keys - no function layer required. Perfect for navigating code, selecting text, and moving through terminal commands. Unlike 60% boards, you get immediate arrow access without memorizing key combinations.

Why did my Bluetooth connection drop?

After 30 minutes without activity, keyboard enters sleep mode and Bluetooth disconnects. Press any key to wake and reconnect.

Will this work with Figma/Adobe/Sketch shortcuts?

Yes. All modifier keys present. Custom shortcuts work identically to full-size boards. Function layer provides access to F-keys for application-specific commands.

What does the volume knob control?

Volume only. Turn to adjust, press to mute. RGB controls are FN + arrow combinations. Simple, immediate, tactile.

Can I use this while charging?

Yes, connect USB-C cable and continue typing. Charging takes approximately 3 hours to full capacity.

How do I check if my keyboard needs charging?

Press ENTER key. If backlight doesn't activate, battery is depleted and needs charging.

Does this work with iPad/Android tablets?

Yes, connects via Bluetooth or USB-C (with compatible adapter) to any device supporting external keyboards.

What's the difference between wired and 2.4GHz modes?

Wired provides unlimited power and zero battery concerns. 2.4GHz offers wireless freedom with gaming-grade latency (typically 1-3ms). Bluetooth adds multi-device switching but slightly higher latency (8-15ms).

What's the difference between Bluetooth and 2.4G mode?

Both are wireless, but 2.4G runs at 1000hz polling rate (same as wired) — better for low-latency workflows. Bluetooth runs at 125hz and connects without a receiver, which is more convenient for switching between devices like a tablet or phone.

Is this good for long nails?

Excellent. It's what we do. The 100-key layout keeps standard key spacing and full-size key access without the compromises of compact layouts. No function-layer remapping on the core keys means no surprises mid-workflow.

Is this good for travel or on-the-go use?

It's wireless and built from aluminum, so it's sturdy and cord-free — but the full layout and solid chassis are designed for stability and staying put on a desk. If portability is the priority, our compact 65% boards are the move. The Ultra Violet and The Retro Finder are built for exactly that: lighter, smaller, and just as satisfying to type on — available in Studio Silent for a noise-free setup or Studio Thock for that deep, resonant sound.

Can I use VIA to remap keys?

Yes. Download the keyboard JSON file and load it into VIA to configure custom layouts and key assignments.